Recipes

Vegan spiced fruit and nut cake, for those bare cupboard days

Whew, it’s been a long time since I’ve posted a recipe on here – you’ll all be thinking I’ve gone books-only! But in the spirit of Bake Off, which returns next week (although let’s be honest, it’s mainly because I have nothing better to do than bake and write all day), I thought I’d share the recipe for the easy peasy fruit and nut cake that I made today. This is a recipe adapted from war time when rationing was in full swing, so uses very basic ingredients rather than anything too expensive, like butter. The recipe I actually adapted it from called it “bare cupboard cake.”

The best bit is that it’s vegan as well so able to be shared with even more people!

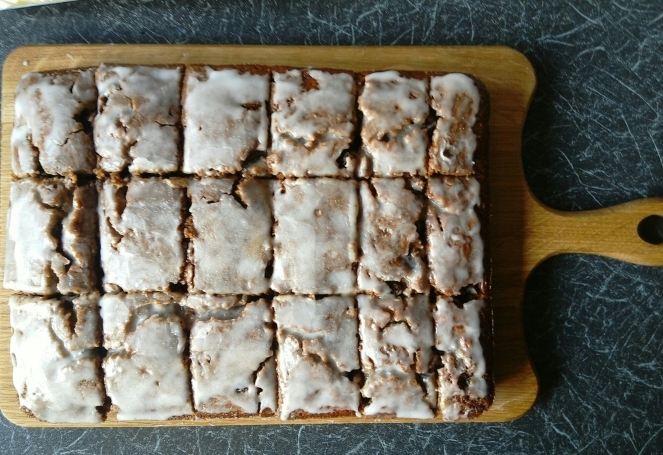
image

Vegan Spiced Fruit and Nut Cake

Ingredients

200g sugar (I used caster and light muscovado, half and half, but it’s totally your choice)
250g self-raising flour
2 tbsp vegetable oil
1/2 tsp mixed spice
1/2 tsp cinnamon
1/2 tsp nutmeg
1 tsp bicarbonate of soda
A pinch of salt
350ml water
100g raisins (or other dried fruit of your choice)
75g pecans, broken into smaller bits (again, you can use any nuts you like)

Icing sugar (sorry, I didn’t measure this as I tend to do icing by eye – , there should be enough icing, when made up, to cover the whole cake, while retaining a thin but opaque look)
Cinnamon sugar (you can buy this ready-made, but if you don’t have it, you can mix 1 tbsp caster or granulated sugar with 1 tsp cinnamon)

Method

1. Preheat oven to 180°c, and grease and line a rectangular baking tin.
2. Mix sugar, oil, fruit, nuts, spices, salt and water in a large pan (I also added some cinnamon raki that my dad bright back from Crete, but I don’t expect that this is a common thing to have lying around!)
3. Place over medium heat, stirring gently. Bring to the boil and leave for 5 minutes.
4. Leave fruit and nut syrup to cool as you mix together flour and bicarbonate of soda.
5. Once syrup has cooled, beat in the flour mixture, ensuring it’s all fully incorporated.
6. Pour into baking tin and bake for 20 minutes or until the top of the cake is a rich, chestnut brown and a skewer comes out clean.
7. Make up icing with icing sugar and water, adding a dash of the cinnamon sugar.
8. Once the cake is cool, top with the lovely runny icing and sprinkle over cinnamon sugar .
9. Cut into portions of your choosing and enjoy!

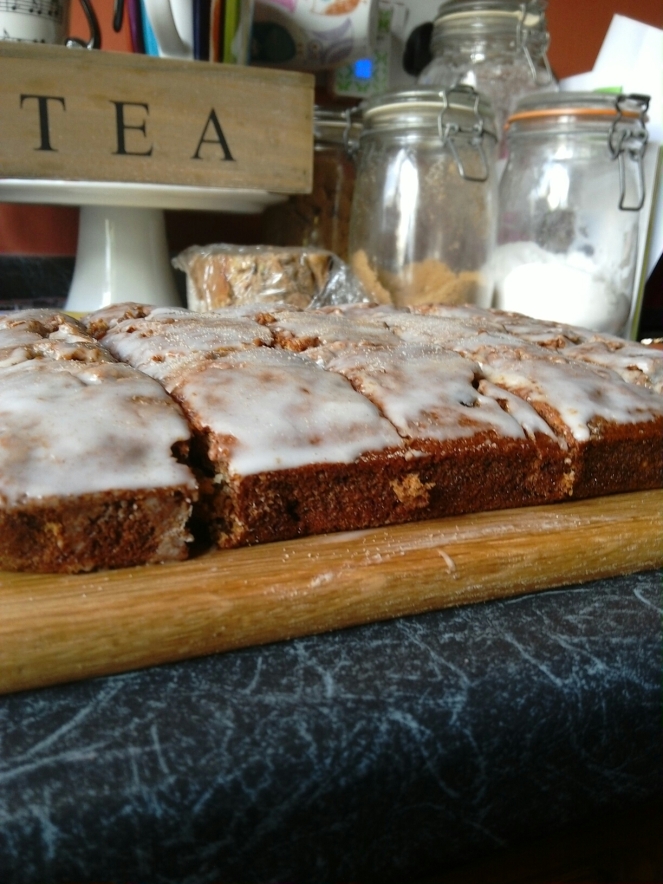
image

What I love about this cake is that it’s so quick and easy, yet has a lovely, moist texture and warm taste to rival most other types of spice-based cake – my parents both mistook it for the much richer gingerbread that I like to bake around Christmas! It’s incredibly versatile and there’s so much potential to experiment with different combinations of fruit, nuts and spices.

Yummy for everyone!

Recipes

My spiced toffee apple cake – a temptingly autumnal treat!

apple cake

On Wednesday I woke up and once again, just knew it was going to be a bad day. This seems to be happening more and more frequently – at least I’ve got another review with the doc next Friday. Not quite sure what more can be done for me though – I’m just stuck in an insufferable cycle of sleeping, trying to study, and crying, and I can’t see any way out.  Thankfully, baking always provides good respite, and feeling inspired by my precious baby Frances winning GBBO the night before (she was my favourite from the start, so I was more than a little ecstatic…), I set off on a quest to recreate autumn in baked form.

I used this cupcake recipe from Baked Perfection as a basic guide, but as always, I just couldn’t stick to it exactly – that’s boring! When I bake, I enjoy experimenting to really make something my own. Maybe it’s because I’m so compliant in every other aspect of my life so baking is my chance to go a bit wild. Vive la cake revolution, and all. Anyway, here’s my take on it:

Ingredients

Cake:

380g plain flour, sieved
4 heaped teaspoons of baking powder
3 heaped teaspoons cinnamon
A generous pinch of salt
One chai tea bag (I used a vanilla chai tea bag by Pukka – ripped open, of course, as it’s the spices and tea leaves inside that you want)
200g golden caster sugar
200g unrefined demerara sugar
4 eggs
A generous splash of vanilla essence
250ml vegetable oil (I used scales though rather than a jug, so if you do that, it’s 200g)
3 apples, grated (I used quite bitter ones as the buttercream is so sweet)
A generous splash of milk (I didn’t actually measure it, oops. Just keep adding it until the batter is a smooth, dropping consistency!)

Toffee buttercream:

50g butter
100g unrefined demerara sugar
A splash of vanilla essence
1/2 teaspoon cinnamon
1 apple, grated
A pinch of salt
Milk (again, I didn’t measure it…what was that I was saying about using baking to rebel? Roughly 3 tablespoons, I think)
150g icing sugar, sifted

Method

1. Preheat oven to 180c/350f/gas mark 4, and line two sandwich tins with greaseproof paper.

2. Mix all the dried ingredients in a large mixing bowl.

3. Make a well in the middle and break eggs into it. Beat into mixture one egg at a time.

4. Add vegetable oil and vanilla essence. Beat thoroughly (a good electric whisk comes in handy!).

5. Add in milk. Before adding the milk, it will be a thick-ish dough – whisking in the milk thoroughly makes it into the smooth batter that it need to be.

5. Mix in grated apples.

6. Distribute between the two tins and bake for about 25 minutes (you might need to cover them with tin foil to prevent the top burning while the inside is undercooked – or maybe that’s just my awful oven).

7. To make the buttercream, melt the butter and sugar in a saucepan over a low heat.

8. Add cinnamon, salt, vanilla essence and grated apple and bring to the boil, stirring all the time.

9. One boiling, remove from heat and add the milk.

10. Heat it again, until it has reached boiling point once more. Once it’s been boiling for about 2 minutes, take it off the heat. Leave it to cool for 20-25 minutes, until it’s lukewarm.

11. Sieve in the icing sugar and mix in. I found this didn’t really make a “buttercream”, as such, more a sticky, runny, toffee icing. But it works really well at that consistency, as the cake soaks up some of the moisture and makes the middle really gooey and yummy!

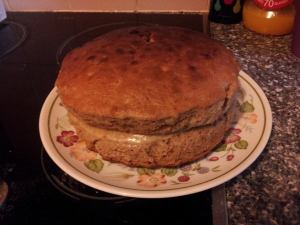
12. Once both the cake and the buttercream have cooled, spread the buttercream in the middle  and sandwich the cakes together. Job done!

This cake tastes particularly good after a day or two – I had a slice as soon as it was done, and I thought it was a bit on the sweet side, but leaving it for a while so that the buttercream can absorb into the cake really makes it extra special. As proof, I took it into my project week class today to share in the break, and it went down a treat – I had comments from friends telling me that I should drop out of uni and open a bakery instead! It made perfect fuel for a gruelling three-hour fugue-writing session. 🙂

Let me know what you think!

Recipes

How to make a healthy and delicious chicken curry

Recently I bought a big tub of fromage frais by accident, thinking it was yoghurt and I could put it on my Weetabix. How wrong I was. Desperately trying to find a use for it, I searched long and hard for recipes I could use it in. I was planning on trying to make chicken curry from scratch for the first time (I’ll admit – I am rather fond of Lidl’s 89p curry sauces!) so I decided to try and adapt various curry recipes I found to include fromage frais. I eventually conjured up this little recipe, and not to blow my own trumpet, but it is delicious.

What you’ll need (for two servings)

250g chicken breast, chopped into strips (I usually use Farmfoods pre-cooked chicken breast strips as it’s only £2 for 500g and mess/chopping-free)
1 tsp garlic, finely chopped
Half an onion, finely chopped
A drizzle of olive oil (to fry all this in)
200ml chicken stock
1 tsp medium curry powder (or more or less, depending on your tastes)
Generous sprinklings of salt, black pepper, coriander, paprika and turmeric
4 tbsp fromage frais (although Greek yoghurt works well too!)
Naan bread or rice
Optional extras: any other spices you fancy, bay leaves.

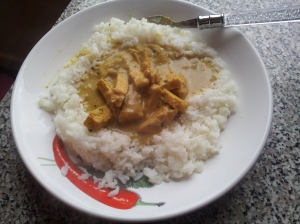
First of all, fry the onion and garlic until slightly brown. Add the chicken and fry until it’s also slightly brown. Pour in the stock and add salt and pepper. Stir. Add the curry powder and the various spices. Leave to simmer for 10 minutes. Finally, turn down the heat and add the fromage frais/yoghurt and stir in – doing this too early will cause it to curdle, so that’s why you need to leave it til last! Serve with either naan bread or rice (or both, if that’s how you roll). Be warned, it’s quite a liquid-y curry because of the amount of stock in it, so make sure you cook enough rice to soak it all up.

What I like about this curry is it’s really aromatic and the spices work really well with the chicken. The way it smells when it’s cooking is just amazing! It’s also pretty healthy and cheap to make, so perfect for students. Much as I love shop-bought curry sauces, I prefer making my own because I know what’s in it – I don’t tend to read the ingredients when I buy curry sauce, but I bet there would be some words I don’t recognise! I haven’t tried making a vegetarian version of it yet, but that’ll be something I’ll investigate in future. The veggie options seem endless: mixed veg, sweet potato, butternut squash, potato, Quorn (all with vegetable stock of course)…Let me know what variations you’d make!

Bon appétit!

20130428_182323